OpenSSL Essentials: Working with SSL Certificates, Private Keys and CSRs
Introduction
OpenSSL is a versatile command line tool that can be used for a large variety of tasks related to Public Key Infrastructure (PKI) and HTTPS (HTTP over TLS). This cheat sheet style guide provides a quick reference to OpenSSL commands that are useful in common, everyday scenarios. This includes OpenSSL examples of generating private keys, certificate signing requests, and certificate format conversion. It does not cover all of the uses of OpenSSL.
How to Use This Guide:
- If you are not familiar with certificate signing requests (CSRs), read the first section
- Aside from the first section, this guide is in a simple, cheat sheet format--self-contained command line snippets
- Jump to any section that is relevant to the task you are trying to complete (Hint: use the Contentsmenu on the bottom-left or your browser's Find function)
- Most of the commands are one-liners that have been expanded to multiple lines (using the
\symbol) for clarity
About Certificate Signing Requests (CSRs)
If you would like to obtain an SSL certificate from a certificate authority (CA), you must generate a certificate signing request (CSR). A CSR consists mainly of the public key of a key pair, and some additional information. Both of these components are inserted into the certificate when it is signed.
Whenever you generate a CSR, you will be prompted to provide information regarding the certificate. This information is known as a Distinguised Name (DN). An important field in the DN is the Common Name (CN), which should be the exact Fully Qualified Domain Name (FQDN) of the host that you intend to use the certificate with. It is also possible to skip the interactive prompts when creating a CSR by passing the information via command line or from a file.
The other items in a DN provide additional information about your business or organization. If you are purchasing an SSL certificate from a certificate authority, it is often required that these additional fields, such as "Organization", accurately reflect your organization's details.
Here is an example of what the CSR information prompt will look like:
---
Country Name (2 letter code) [AU]:US
State or Province Name (full name) [Some-State]:New York
Locality Name (eg, city) []:Brooklyn
Organization Name (eg, company) [Internet Widgits Pty Ltd]:Example Brooklyn Company
Organizational Unit Name (eg, section) []:Technology Division
Common Name (e.g. server FQDN or YOUR name) []:examplebrooklyn.com
Email Address []:
If you want to non-interactively answer the CSR information prompt, you can do so by adding the
-subjoption to any OpenSSL commands that request CSR information. Here is an example of the option, using the same information displayed in the code block above:-subj "/C=US/ST=New York/L=Brooklyn/O=Example Brooklyn Company/CN=examplebrooklyn.com"
Now that you understand CSRs, feel free to jump around to whichever section of this guide that covers your OpenSSL needs.
Generating CSRs
This section covers OpenSSL commands that are related to generating CSRs (and private keys, if they do not already exist). CSRs can be used to request SSL certificates from a certificate authority.
Keep in mind that you may add the CSR information non-interactively with the
-subj option, mentioned in the previous section.Generate a Private Key and a CSR
Use this method if you want to use HTTPS (HTTP over TLS) to secure your Apache HTTP or Nginx web server, and you want to use a Certificate Authority (CA) to issue the SSL certificate. The CSR that is generated can be sent to a CA to request the issuance of a CA-signed SSL certificate. If your CA supports SHA-2, add the
-sha256 option to sign the CSR with SHA-2.
This command creates a 2048-bit private key (
domain.key) and a CSR (domain.csr) from scratch:openssl req \
-newkey rsa:2048 -nodes -keyout domain.key \
-out domain.csr
Answer the CSR information prompt to complete the process.
The
-newkey rsa:2048 option specifies that the key should be 2048-bit, generated using the RSA algorithm. The -nodes option specifies that the private key should not be encrypted with a pass phrase. The -new option, which is not included here but implied, indicates that a CSR is being generated.Generate a CSR from an Existing Private Key
Use this method if you already have a private key that you would like to use to request a certificate from a CA.
This command creates a new CSR (
domain.csr) based on an existing private key (domain.key):openssl req \
-key domain.key \
-new -out domain.csr
Answer the CSR information prompt to complete the process.
The
-key option specifies an existing private key (domain.key) that will be used to generate a new CSR. The -new option indicates that a CSR is being generated.Generate a CSR from an Existing Certificate and Private Key
Use this method if you want to renew an existing certificate but you or your CA do not have the original CSR for some reason. It basically saves you the trouble of re-entering the CSR information, as it extracts that information from the existing certificate.
This command creates a new CSR (
domain.csr) based on an existing certificate (domain.crt) and private key (domain.key):openssl x509 \
-in domain.crt \
-signkey domain.key \
-x509toreq -out domain.csr
The
-x509toreq option specifies that you are using an X509 certificate to make a CSR.Generating SSL Certificates
If you would like to use an SSL certificate to secure a service but you do not require a CA-signed certificate, a valid (and free) solution is to sign your own certificates.
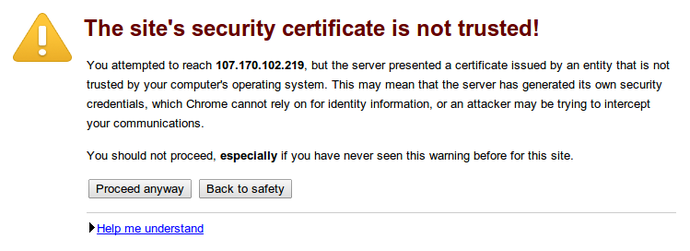
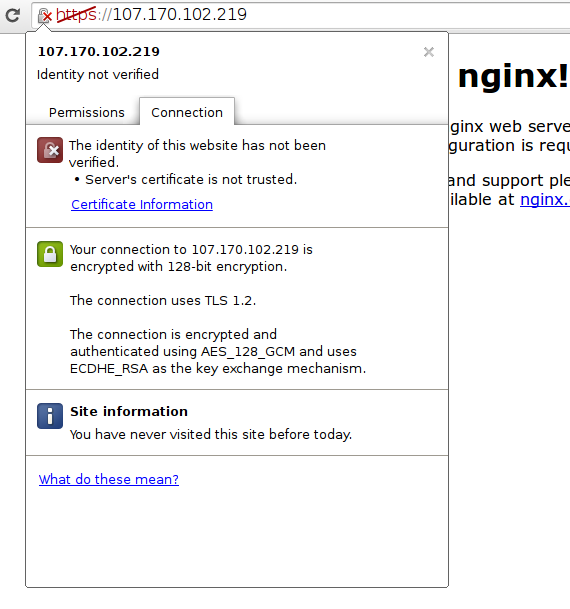
A common type of certificate that you can issue yourself is a self-signed certificate. A self-signed certificate is a certificate that is signed with its own private key. Self-signed certificates can be used to encrypt data just as well as CA-signed certificates, but your users will be displayed a warning that says that the certificate is not trusted by their computer or browser. Therefore, self-signed certificates should only be used if you do not need to prove your service's identity to its users (e.g. non-production or non-public servers).
This section covers OpenSSL commands that are related to generating self-signed certificates.
Generate a Self-Signed Certificate
Use this method if you want to use HTTPS (HTTP over TLS) to secure your Apache HTTP or Nginx web server, and you do not require that your certificate is signed by a CA.
This command creates a 2048-bit private key (
domain.key) and a self-signed certificate (domain.crt) from scratch:openssl req \
-newkey rsa:2048 -nodes -keyout domain.key \
-x509 -days 365 -out domain.crt
Answer the CSR information prompt to complete the process.
The
-x509 option tells req to create a self-signed cerificate. The -days 365 option specifies that the certificate will be valid for 365 days. A temporary CSR is generated to gather information to associate with the certificate.Generate a Self-Signed Certificate from an Existing Private Key
Use this method if you already have a private key that you would like to generate a self-signed certificate with it.
This command creates a self-signed certificate (
domain.crt) from an existing private key (domain.key):openssl req \
-key domain.key \
-new \
-x509 -days 365 -out domain.crt
Answer the CSR information prompt to complete the process.
The
-x509 option tells req to create a self-signed cerificate. The -days 365 option specifies that the certificate will be valid for 365 days. The -new option enables the CSR information prompt.Generate a Self-Signed Certificate from an Existing Private Key and CSR
Use this method if you already have a private key and CSR, and you want to generate a self-signed certificate with them.
This command creates a self-signed certificate (
domain.crt) from an existing private key (domain.key) and (domain.csr):openssl x509 \
-signkey domain.key \
-in domain.csr \
-req -days 365 -out domain.crt
The
-days 365 option specifies that the certificate will be valid for 365 days.View Certificates
Certificate and CSR files are encoded in PEM format, which is not readily human-readable.
This section covers OpenSSL commands that will output the actual entries of PEM-encoded files.
View CSR Entries
This command allows you to view and verify the contents of a CSR (
domain.csr) in plain text:openssl req -text -noout -verify -in domain.csr
View Certificate Entries
This command allows you to view the contents of a certificate (
domain.crt) in plain text:openssl x509 -text -noout -in domain.crt
Verify a Certificate was Signed by a CA
Use this command to verify that a certificate (
domain.crt) was signed by a specific CA certificate (ca.crt):openssl verify -verbose -CAFile ca.crt domain.crt
Private Keys
This section covers OpenSSL commands that are specific to creating and verifying private keys.
Create a Private Key
Use this command to create a password-protected, 2048-bit private key (
domain.key):openssl genrsa -des3 -out domain.key 2048
Enter a password when prompted to complete the process.
Verify a Private Key
Use this command to check that a private key (
domain.key) is a valid key:openssl rsa -check -in domain.key
If your private key is encrypted, you will be prompted for its pass phrase. Upon success, the unencrypted key will be output on the terminal.
Verify a Private Key Matches a Certificate and CSR
Use these commands to verify if a private key (
domain.key) matches a certificate (domain.crt) and CSR (domain.csr):openssl rsa -noout -modulus -in domain.key | openssl md5
openssl x509 -noout -modulus -in domain.crt | openssl md5
openssl req -noout -modulus -in domain.csr | openssl md5
If the output of each command is identical there is an extremely high probability that the private key, certificate, and CSR are related.
Encrypt a Private Key
This takes an unencrypted private key (
unencrypted.key) and outputs an encrypted version of it (encrypted.key):openssl rsa -des3 \
-in unencrypted.key \
-out encrypted.key
Enter your desired pass phrase, to encrypt the private key with.
Decrypt a Private Key
This takes an encrypted private key (
encrypted.key) and outputs a decrypted version of it (decrypted.key):openssl rsa \
-in encrypted.key \
-out decrypted.key
Enter the pass phrase for the encrypted key when prompted.
Convert Certificate Formats
All of the certificates that we have been working with have been X.509 certificates that are ASCII PEM encoded. There are a variety of other certificate encoding and container types; some applications prefer certain formats over others. Also, many of these formats can contain multiple items, such as a private key, certificate, and CA certificate, in a single file.
OpenSSL can be used to convert certificates to and from a large variety of these formats. This section will cover a some of the possible conversions.
Convert PEM to DER
Use this command if you want to convert a PEM-encoded certificate (
domain.crt) to a DER-encoded certificate (domain.der), a binary format:openssl x509 \
-in domain.crt \
-outform der -out domain.der
The DER format is typically used with Java.
Convert DER to PEM
Use this command if you want to convert a DER-encoded certificate (
domain.der) to a PEM-encoded certificate (domain.crt):openssl x509 \
-inform der -in domain.der \
-out domain.crt
Convert PEM to PKCS7
Use this command if you want to add PEM certificates (
domain.crt and ca-chain.crt) to a PKCS7 file (domain.p7b):openssl crl2pkcs7 -nocrl \
-certfile domain.crt \
-certfile ca-chain.crt \
-out domain.p7b
Note that you can use one or more
-certfile options to specify which certificates to add to the PKCS7 file.
PKCS7 files, also known as P7B, are typically used in Java Keystores and Microsoft IIS (Windows). They are ASCII files which can contain certificates and CA certificates.
Convert PKCS7 to PEM
Use this command if you want to convert a PKCS7 file (
domain.p7b) to a PEM file:openssl pkcs7 \
-in domain.p7b \
-print_certs -out domain.crt
Note that if your PKCS7 file has multiple items in it (e.g. a certificate and a CA intermediate certificate), the PEM file that is created will contain all of the items in it.
Convert PEM to PKCS12
Use this command if you want to take a private key (
domain.key) and a certificate (domain.crt), and combine them into a PKCS12 file (domain.pfx):openssl pkcs12 \
-inkey domain.key \
-in domain.crt \
-export -out domain.pfx
You will be prompted for export passwords, which you may leave blank. Note that you may add a chain of certificates to the PKCS12 file by concatenating the certificates together in a single PEM file (
domain.crt) in this case.
PKCS12 files, also known as PFX files, are typically used for importing and exporting certificate chains in Micrsoft IIS (Windows).
Convert PKCS12 to PEM
Use this command if you want to convert a PKCS12 file (
domain.pfx) and convert it to PEM format (domain.combined.crt):openssl pkcs12 \
-in domain.pfx \
-nodes -out domain.combined.crt
Note that if your PKCS12 file has multiple items in it (e.g. a certificate and private key), the PEM file that is created will contain all of the items in it.
OpenSSL Version
The
openssl version command can be used to check which version you are running. The version of OpenSSL that you are running, and the options it was compiled with affect the capabilities (and sometimes the command line options) that are available to you.
The following command displays the OpenSSL version that you are running, and all of the options that it was compiled with:
openssl version -a
This guide was written using an OpenSSL binary with the following details (the output of the previous command):
OpenSSL 1.0.1f 6 Jan 2014
built on: Mon Apr  7 21:22:23 UTC 2014
platform: debian-amd64
options:  bn(64,64) rc4(16x,int) des(idx,cisc,16,int) blowfish(idx)
compiler: cc -fPIC -DOPENSSL_PIC -DOPENSSL_THREADS -D_REENTRANT -DDSO_DLFCN -DHAVE_DLFCN_H -m64 -DL_ENDIAN -DTERMIO -g -O2 -fstack-protector --param=ssp-buffer-size=4 -Wformat -Werror=format-security -D_FORTIFY_SOURCE=2 -Wl,-Bsymbolic-functions -Wl,-z,relro -Wa,--noexecstack -Wall -DMD32_REG_T=int -DOPENSSL_IA32_SSE2 -DOPENSSL_BN_ASM_MONT -DOPENSSL_BN_ASM_MONT5 -DOPENSSL_BN_ASM_GF2m -DSHA1_ASM -DSHA256_ASM -DSHA512_ASM -DMD5_ASM -DAES_ASM -DVPAES_ASM -DBSAES_ASM -DWHIRLPOOL_ASM -DGHASH_ASM
OPENSSLDIR: "/usr/lib/ssl"
Conclusion
That should cover how most people use OpenSSL to deal with SSL certs! It has many other uses that were not covered here, so feel free to ask or suggest other uses in the comments.
If you are having issues with any of the commands, be sure to comment (and include your OpenSSL version output).
reference:click here


No comments :
Post a Comment